Creating an online game
Internal IP
 First, find out the computer’s internal ip: First, find out your computer’s internal ip: Two ways to find out.
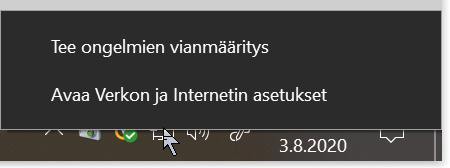
1. Right-click on the network icon in the lower right, it will open the following options: Troubleshoot problems and Open Network and Internet Settings, select it.
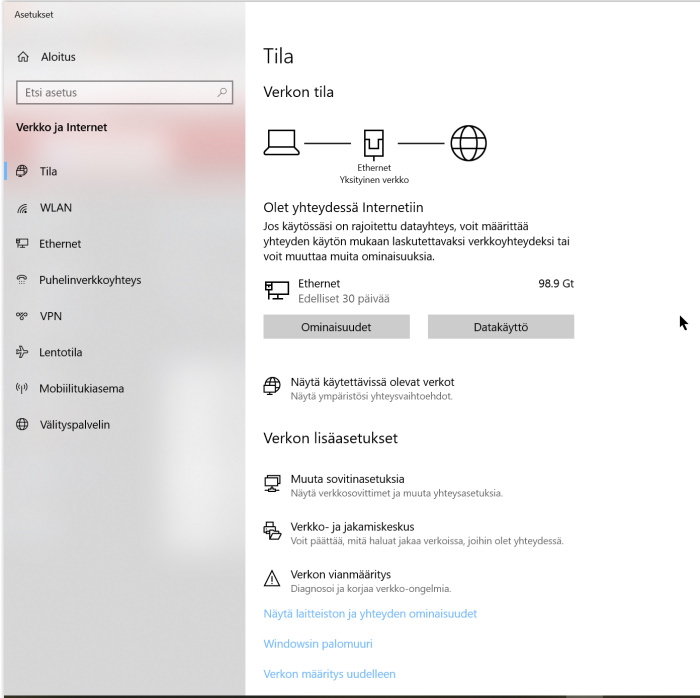
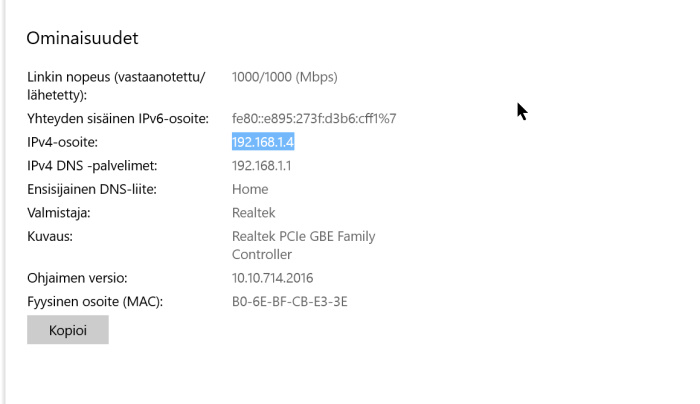
Select the properties, scroll down the page that opens, and retrieve the IPv4 address
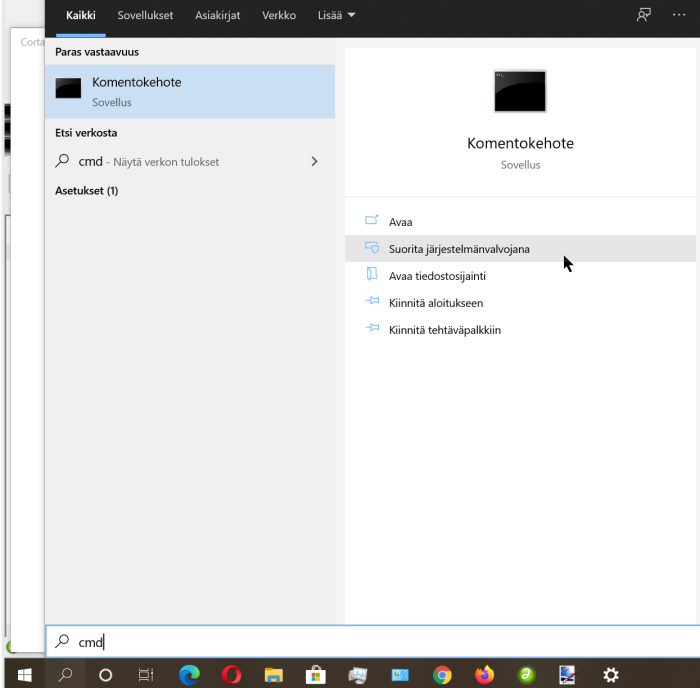
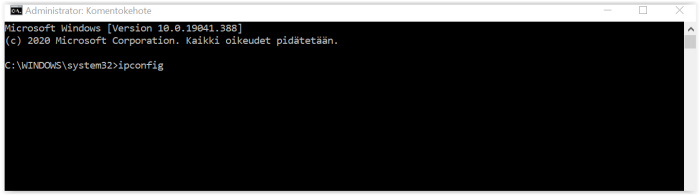
Alternatively, type CMD in the Windows search bar, right-click cmd, and then click Run as administrator.
Picture mod 10
Picture mod 11
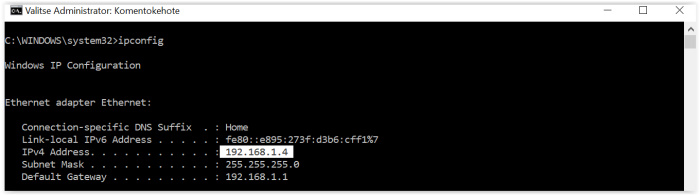
Type ipconfig and press enter
Picture mod 12
Write down the IPv4 Address
Modem settings
We will go through one example of modem settings, different modems have slightly different menus, the functions are essentially the same as in the model presented here. Modem settings are usually accessed by typing http://192.168.1.1/ in the address bar of your browser.

Picture mod1
Enter the Username and Password, the default ones can be found in the modem manual, at least you should change the password.
Picture mod2
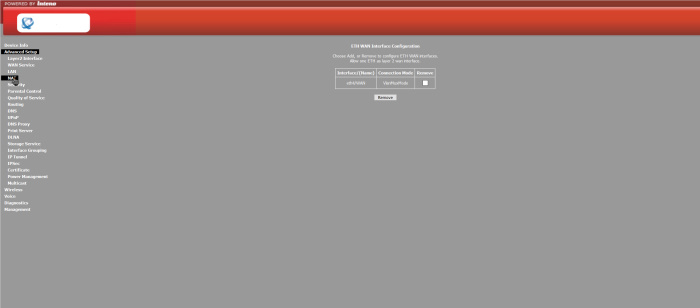
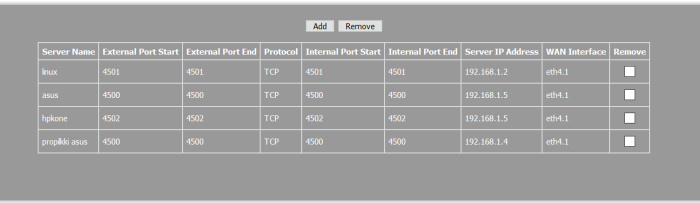
Select : Advanced Setup –> Nat
Picture mod3
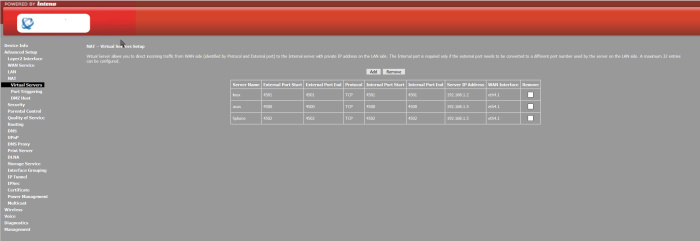
Picture mod4
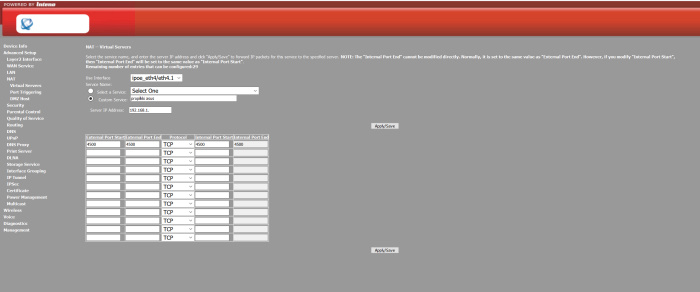
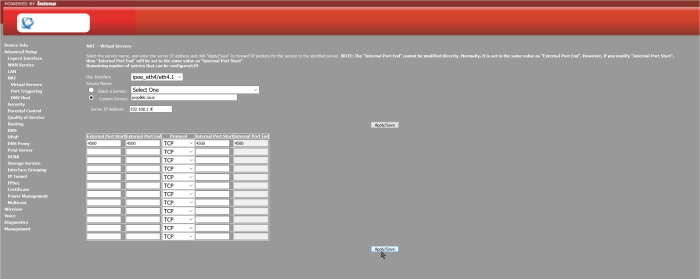
Virtual Servers –> Add
Picture mod5
Write in Custom Service: e.g. Propilkki
Picture mod8
In the Server IP Address field, enter the internal ip e.g. 192.168.1.4
Enter the port number you are using e.g. External Port Start 4500, External Port End 4500, Protocol TCP, (Internal Port Start 4500, Internal Port End 4500) these usually automatically become the same as the External Port Start / End. When everything is written, press the Aply / Save button
Picture mod9
Now the modem settings are OK, let’s create an online game:
Create an online game
Picture vp1
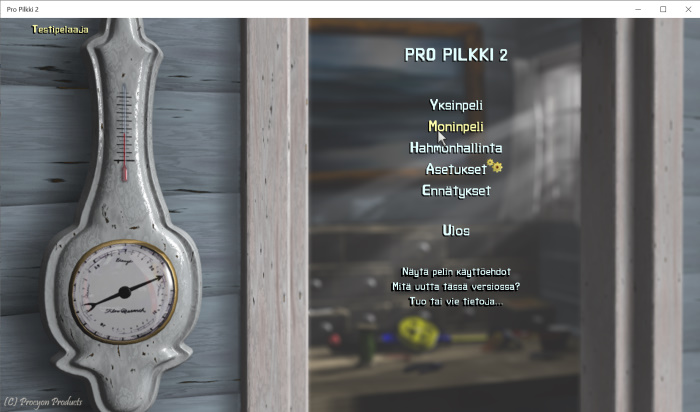
Once you have logged in to the game and selected your character: Select Multiplayer. Note! By default, the modem settings are OK and you can create an online game. Briefly above the modem settings.
Picture vp2
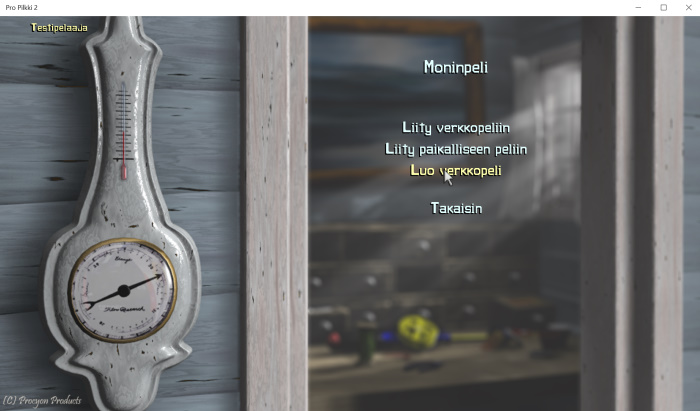
Click Create an online game
Picture vp3
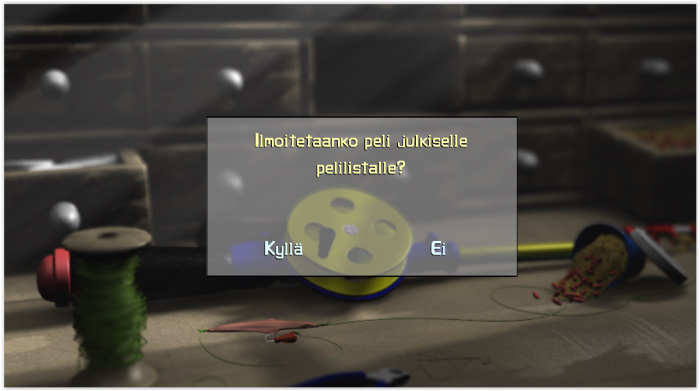
Choose whether or not the game will be listed on the public list. If you select Yes then the game will appear in the public list unless it is password protected so everyone can play.
Picture vp4
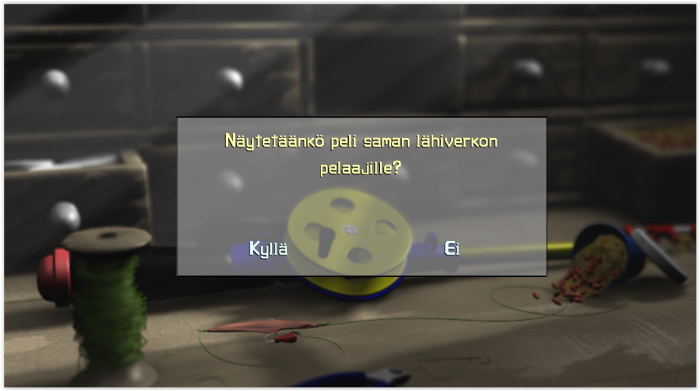
Here you select whether the game is displayed on the LAN. If you do not want the game to appear on the LAN, select No.

Picture vp5
The online game has now started

Picture vp6
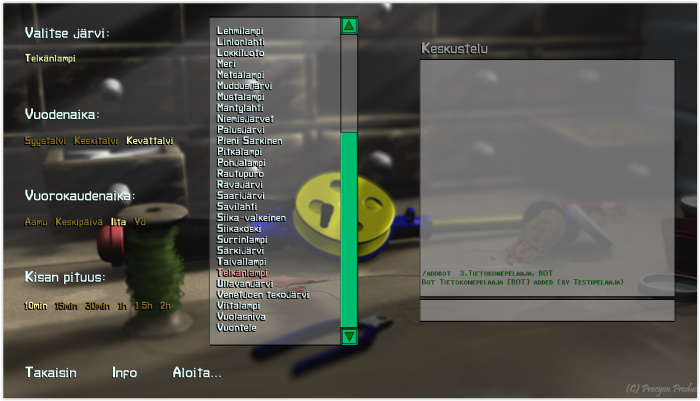
You can choose whether to run the online game automatically, in which case random bodies of water and their game modes will also come automatically. Default 10 min games, Note! when you choose the length of the race for the first game then all the next goes at the same time, e.g. 60min. You can also make the games run with a ready-made script that writes the water bodies in circulation. The command is /autoscript on
Picture vp7
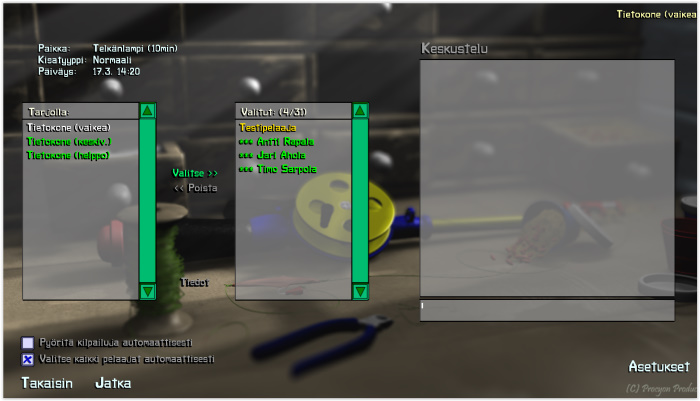
You can also add quiz players here, select the difficulty level and then press select, there will be players with random names.

Picture vp8
You can also create your own players with the command /addbot 3, computer player, BOT (number 3 means difficulty level 1-3, 1 is the easiest, after the comma will be the computer player’s name, and finally after the comma the computer player’s team tag, it is not necessary to write it).
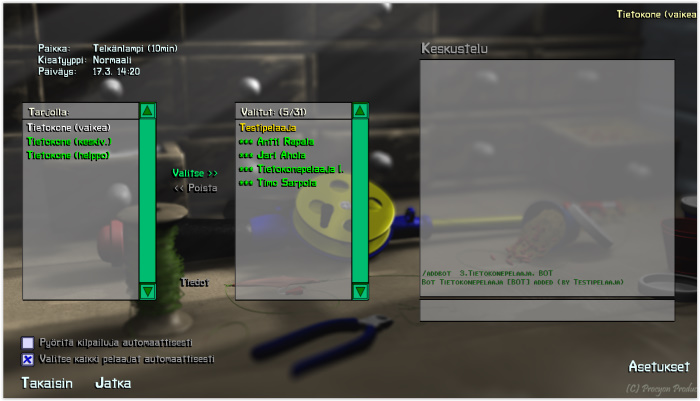
Picture vp9
Here you can also enter other game related settings if you are not playing with autoscript where they are all already there.You can see the players’ time results with the command /results 5 , where 5 means the time in minutes, with the /wait 90 command there will be a 90 sec interval between waterworks before the start of the next one (the times are always set in seconds) . The /timer 3 small pause command takes a 3 min pause and explains a small pause. More commands you can use.
Picture vp10
Picture vp11